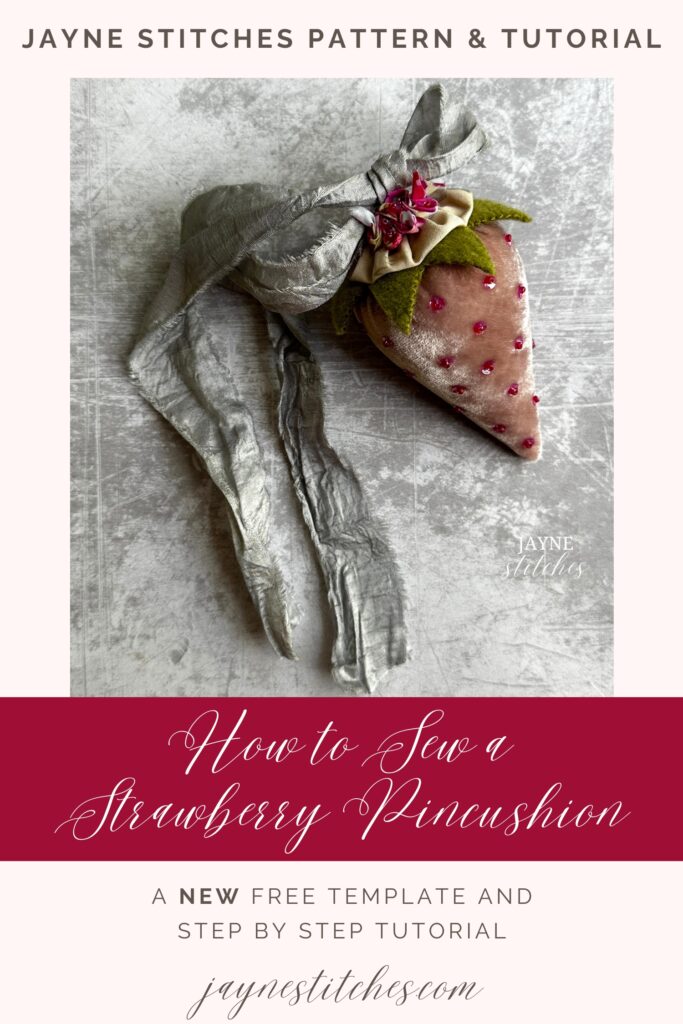
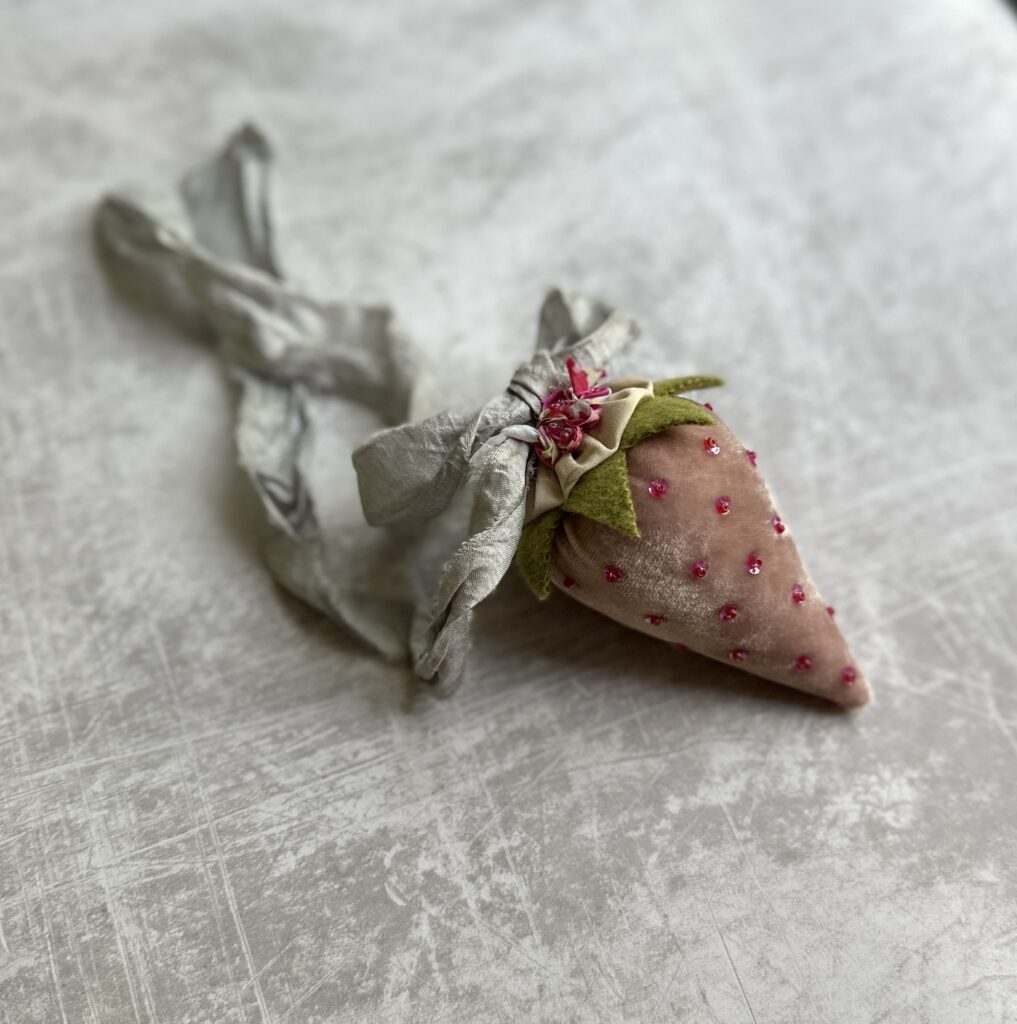
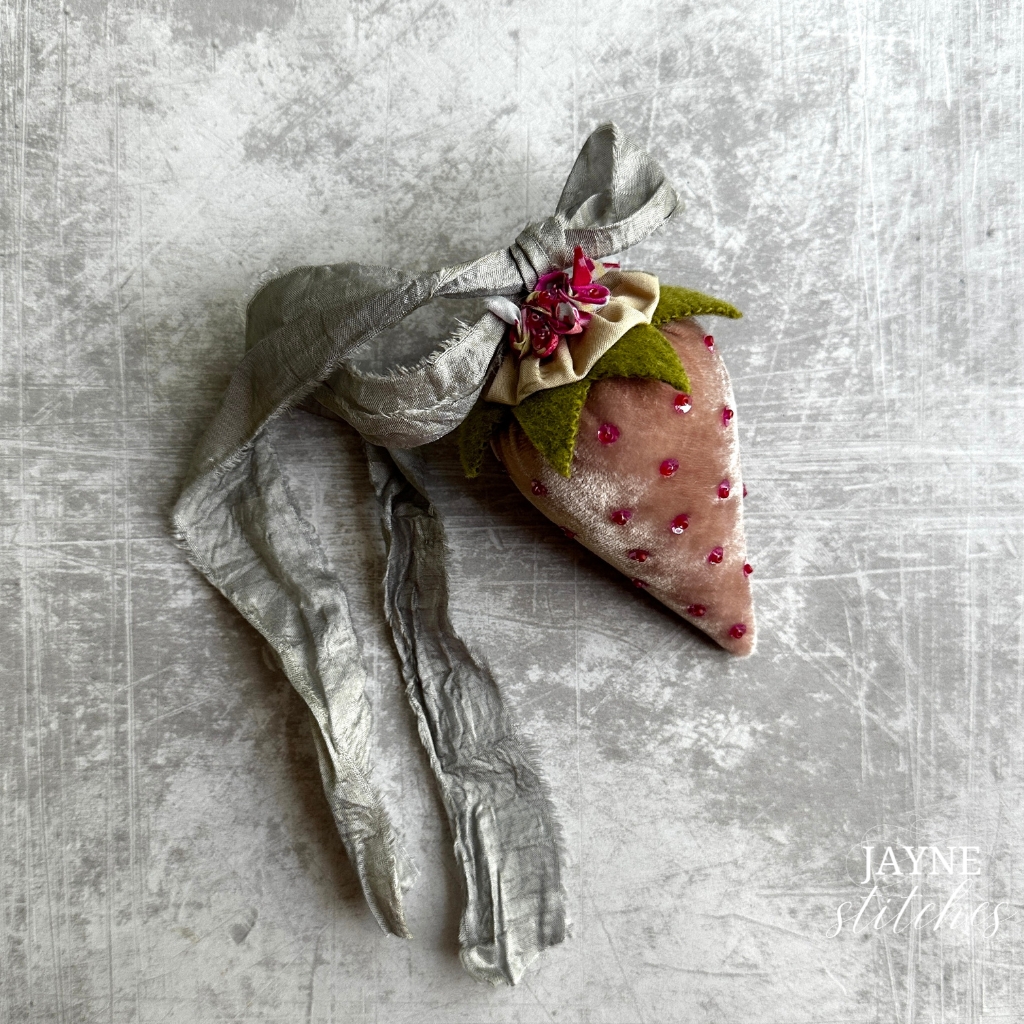
Vintage charm, a little sparkle, and a whole lot of hand stitching joy.
If you’re like me, you probably can’t resist a good pincushion—and if it happens to be shaped like a strawberry? Even better. These sweet little strawberries are just the right mix of practical and pretty. They make lovely gifts, use up precious fabric scraps, and add a cheerful pop to any sewing basket.
Let me walk you through how I made mine—from sewing and stuffing, to adding that leafy wool felt top, cotton yo-yo and a silk ribbon, and finally, the best part: decorating with tiny seed beads and sequins. You can keep it simple or go as sparkly as you like.
To see a video of the entire tutorial click below 👇🏻
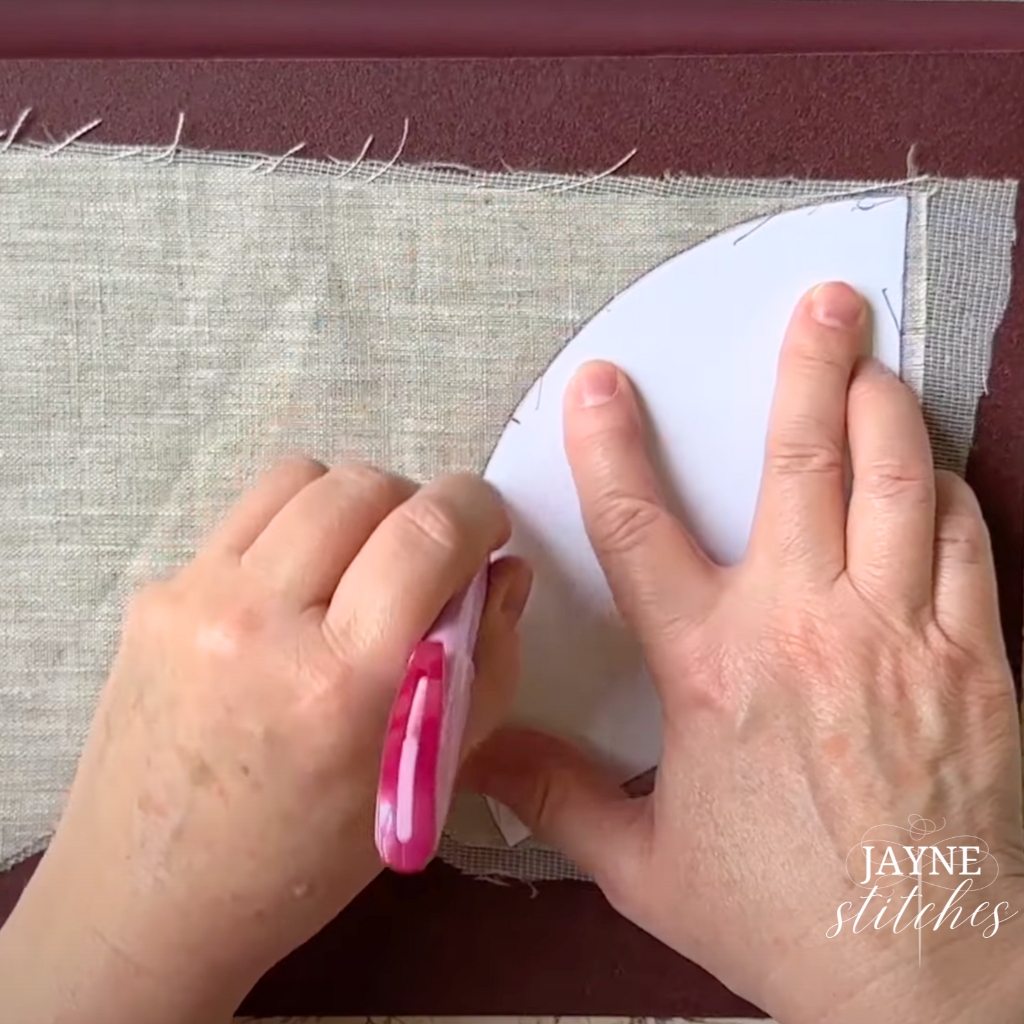
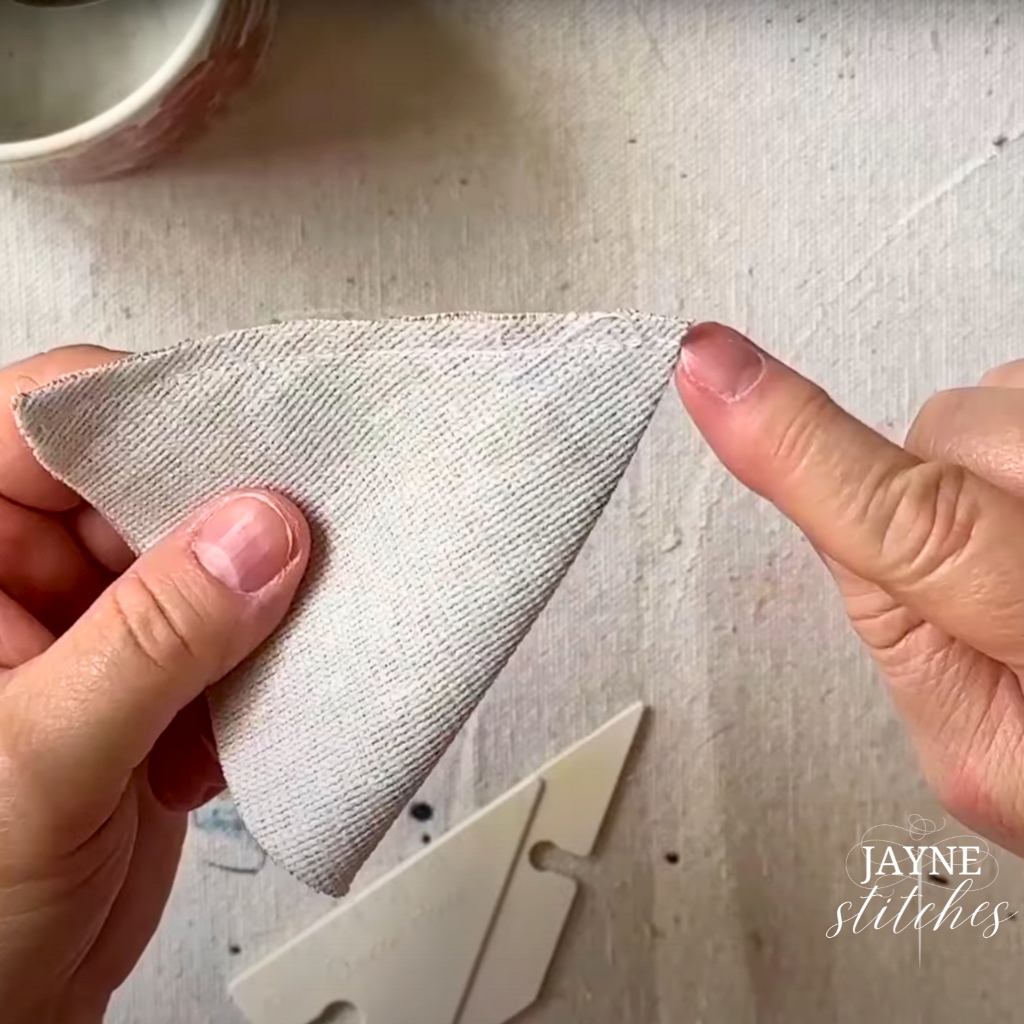
Cut the Strawberry body using the template.
Fold it in half right sides together and sew with 1/4″ seam allowance down the long side to make a cone shape. Back stitch at the beginning and end if using a sewing machine, if sewing by hand use a small backstitch at the beginning and ending and make your stitches as small as possible.
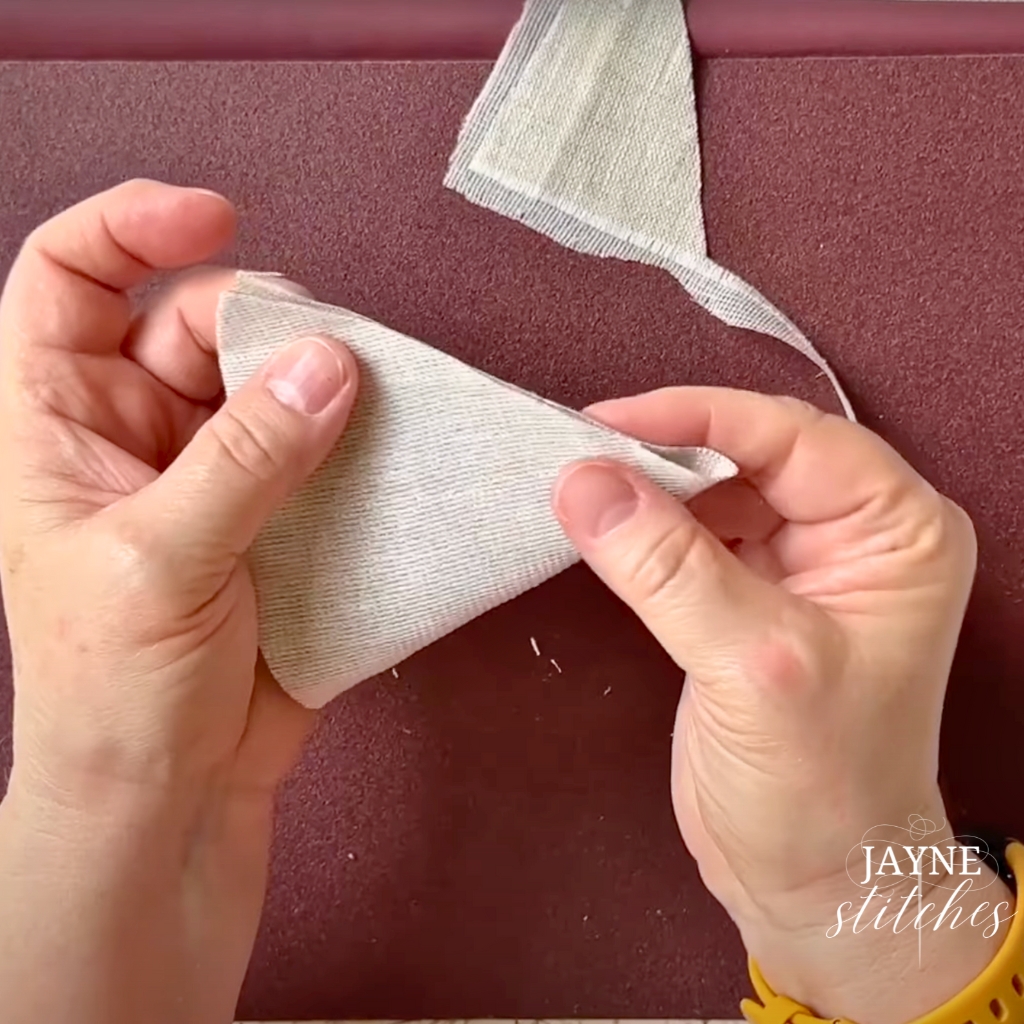
Trim just a tiny bit from the end point and then turn the cone right side out and push the end point out, gently, with a point turner.
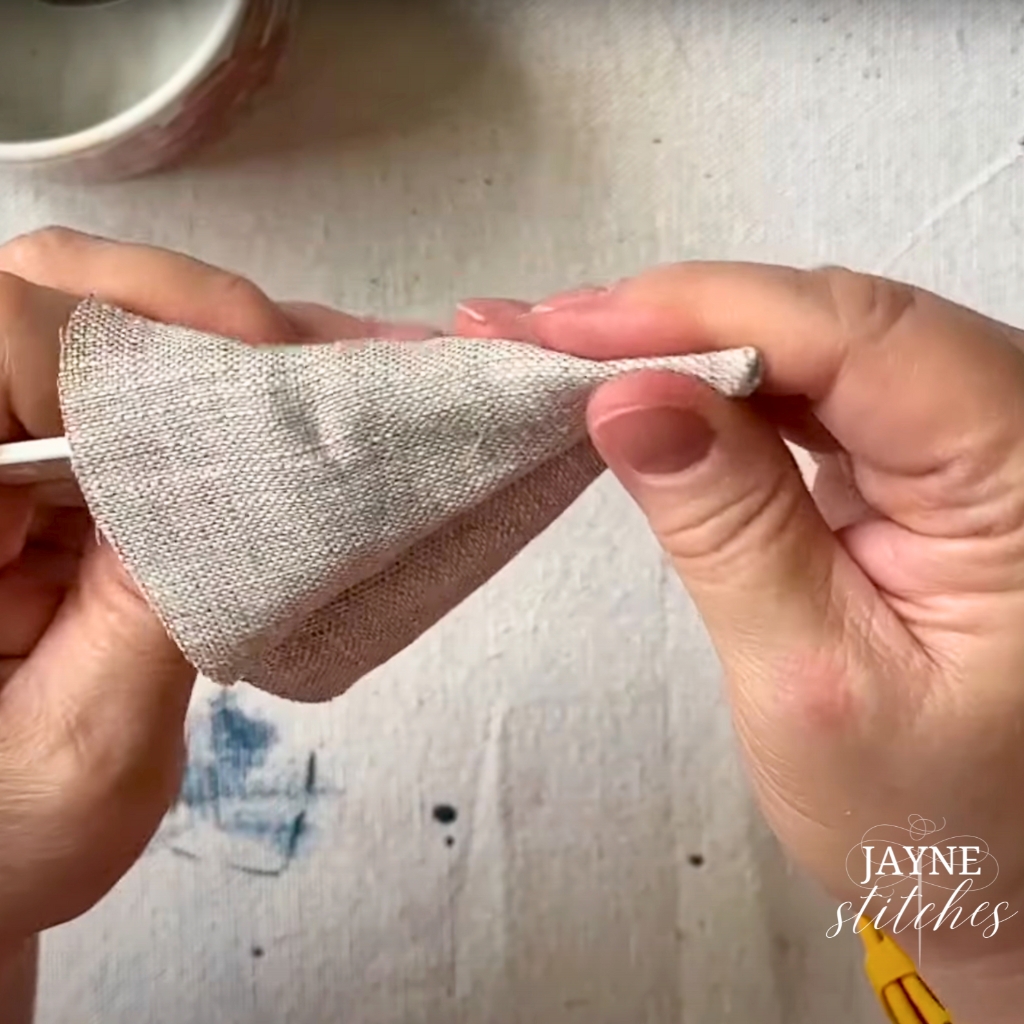
Take a strong thread and sew a gathering stitch all the way around the open edge, do not knot off and put the needle and thread aside.
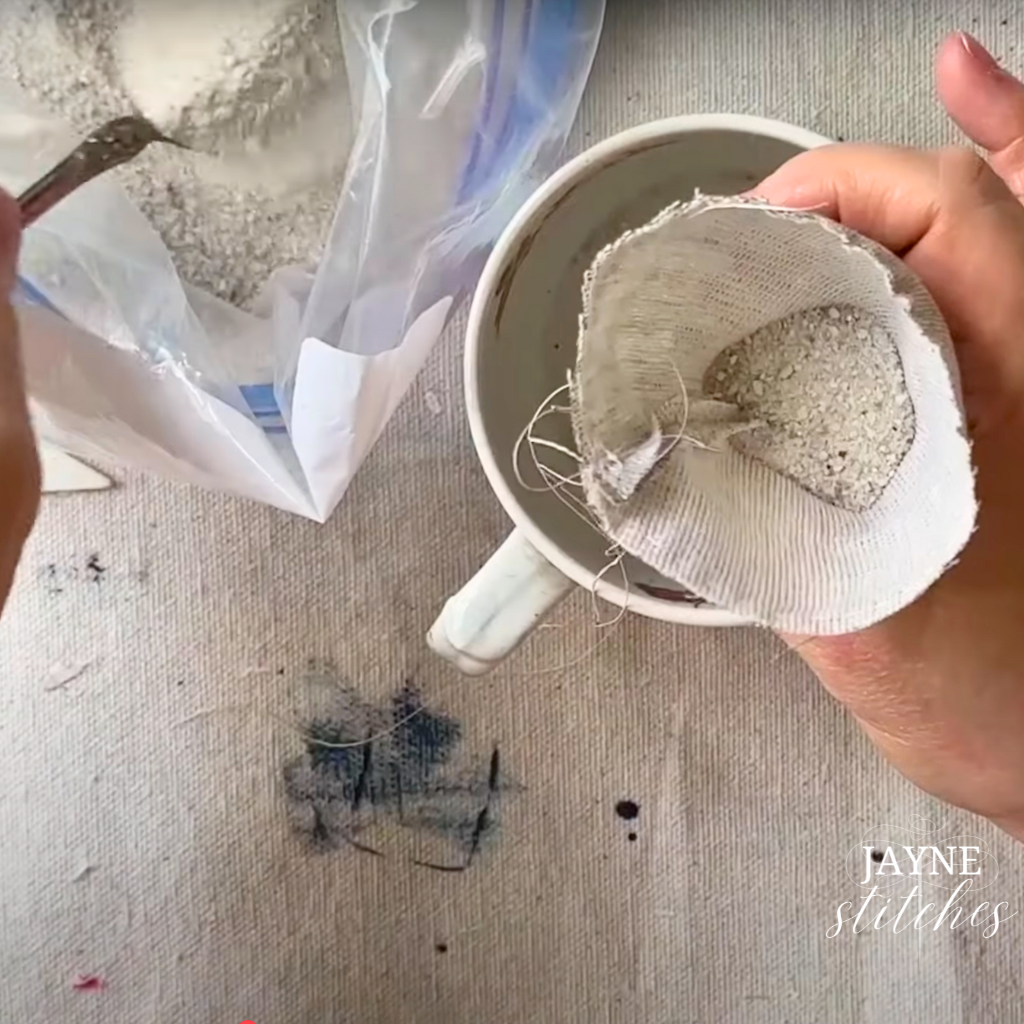
I fill the strawberry 2/3rds with clean sand—it gives it weight and keeps pins sharp. You can use a tiny funnel, spoon, or just roll up a piece of paper into a funnel shape. Don’t overfill with sand—you want it about 2/3rds filled.
To help sand (or emery) settle take a long needle or chop stick to “stir” and push sand into the point of the strawberry bottom.
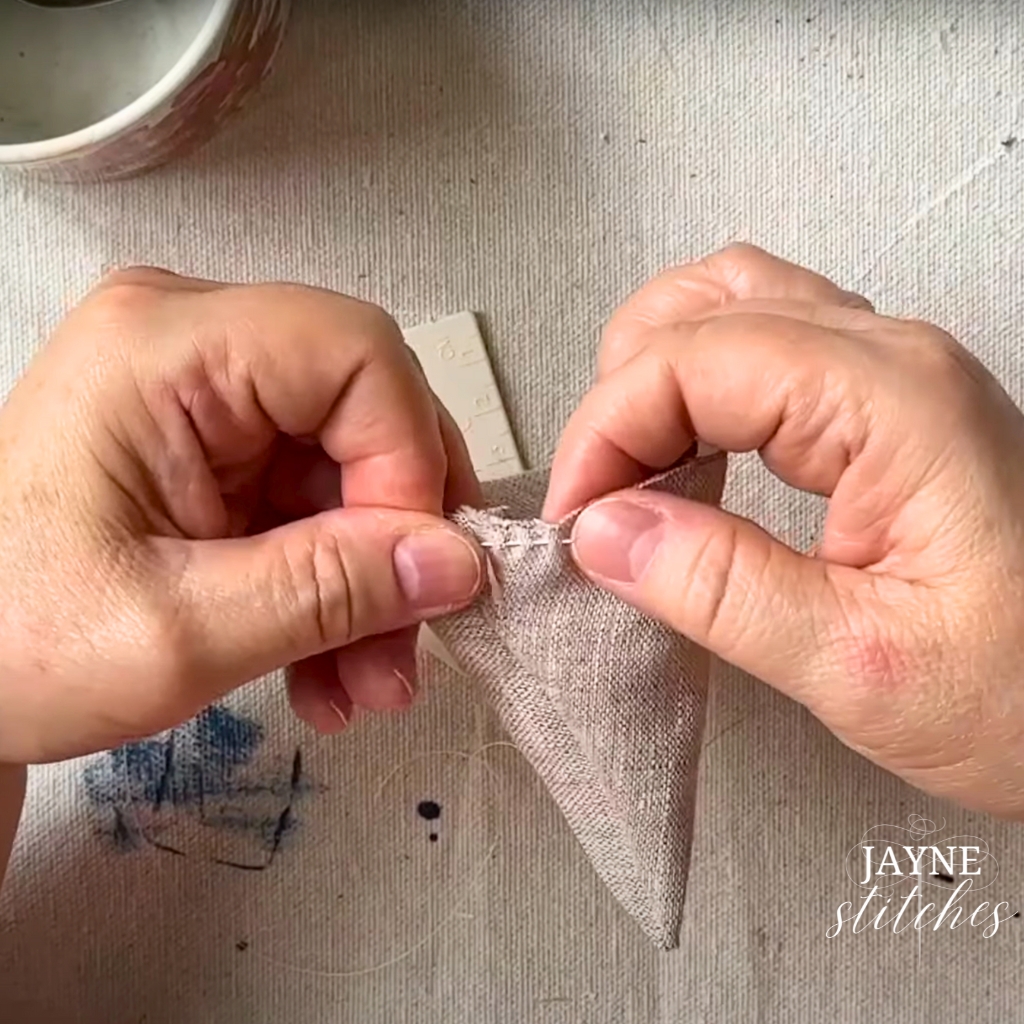
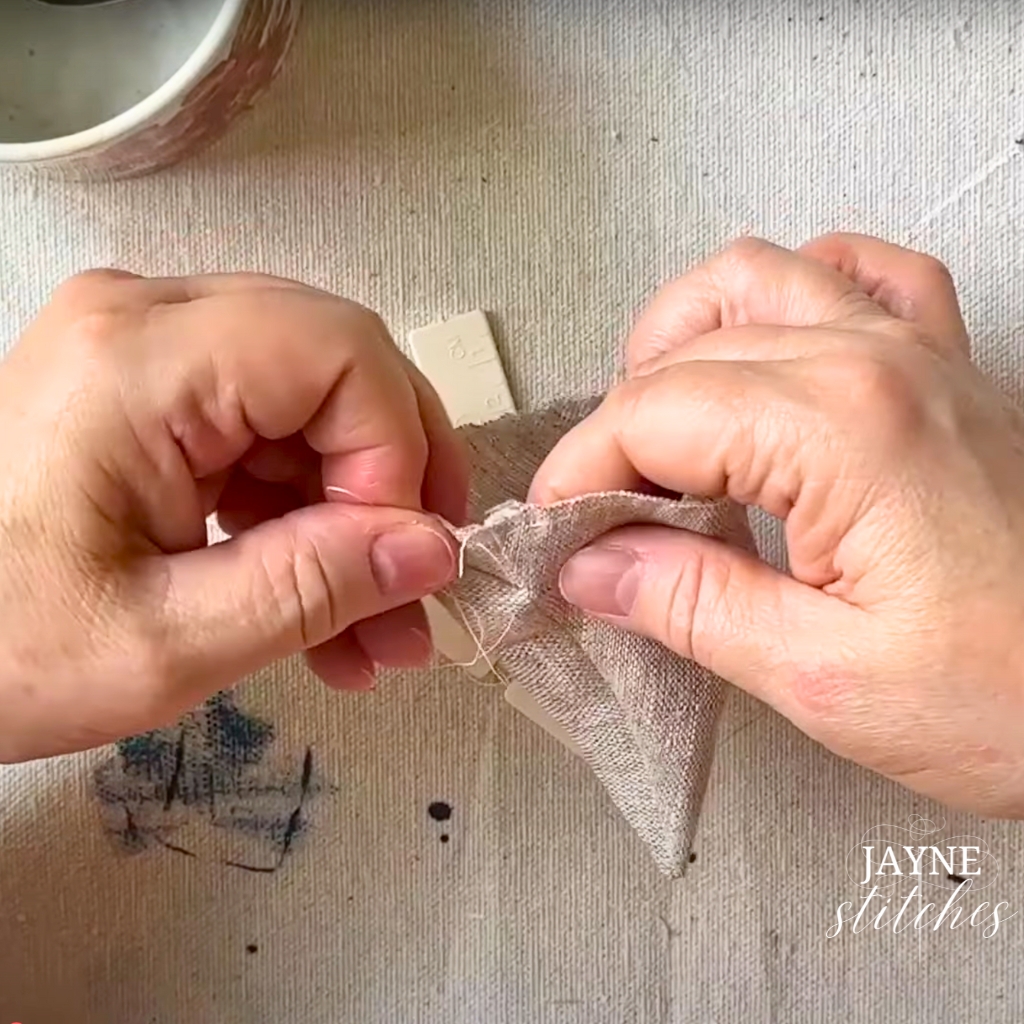
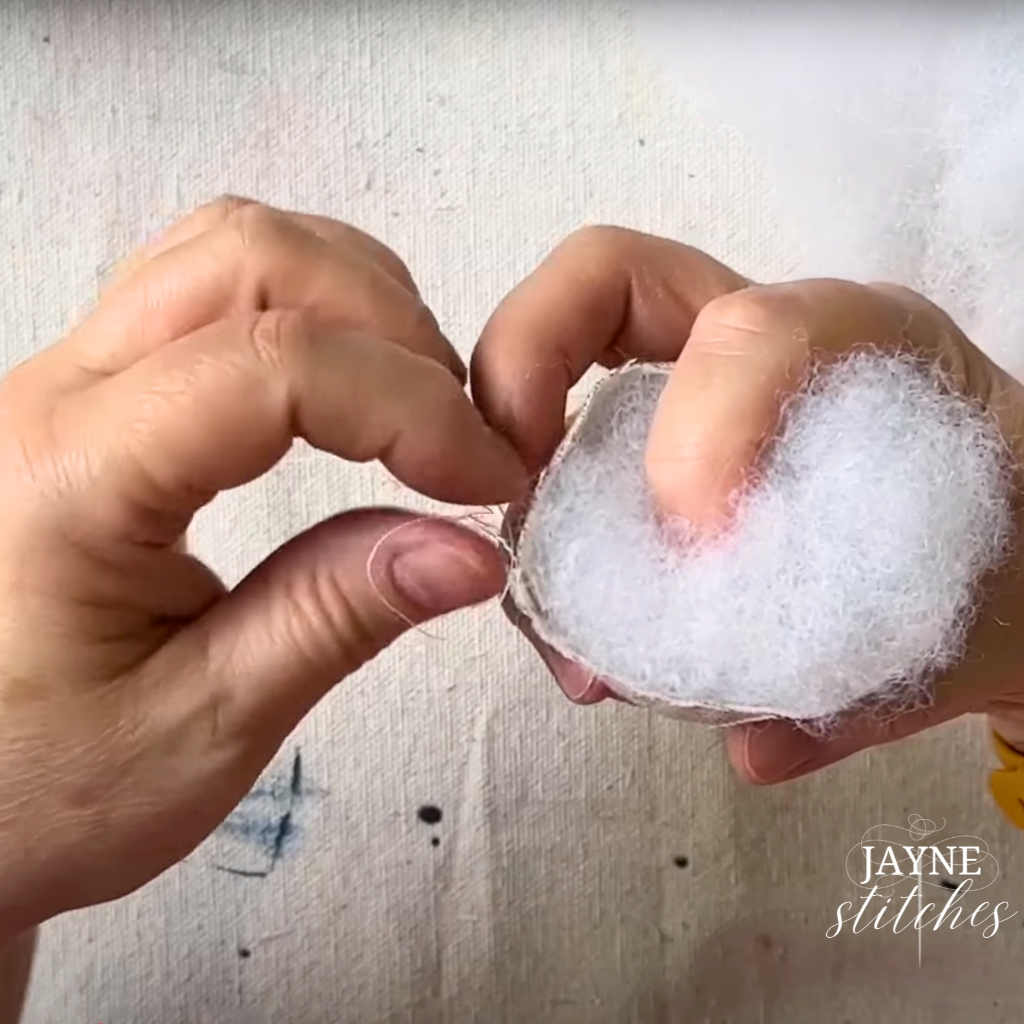
Next, top off the strawberry with poly-fil stuffing. This gives the body a nice firm shape and keeps the top soft enough to stitch through later. This for me at least was the most fiddly part as the poly-fil tries to escape! So I pull the gathering thread tighter as I fill.
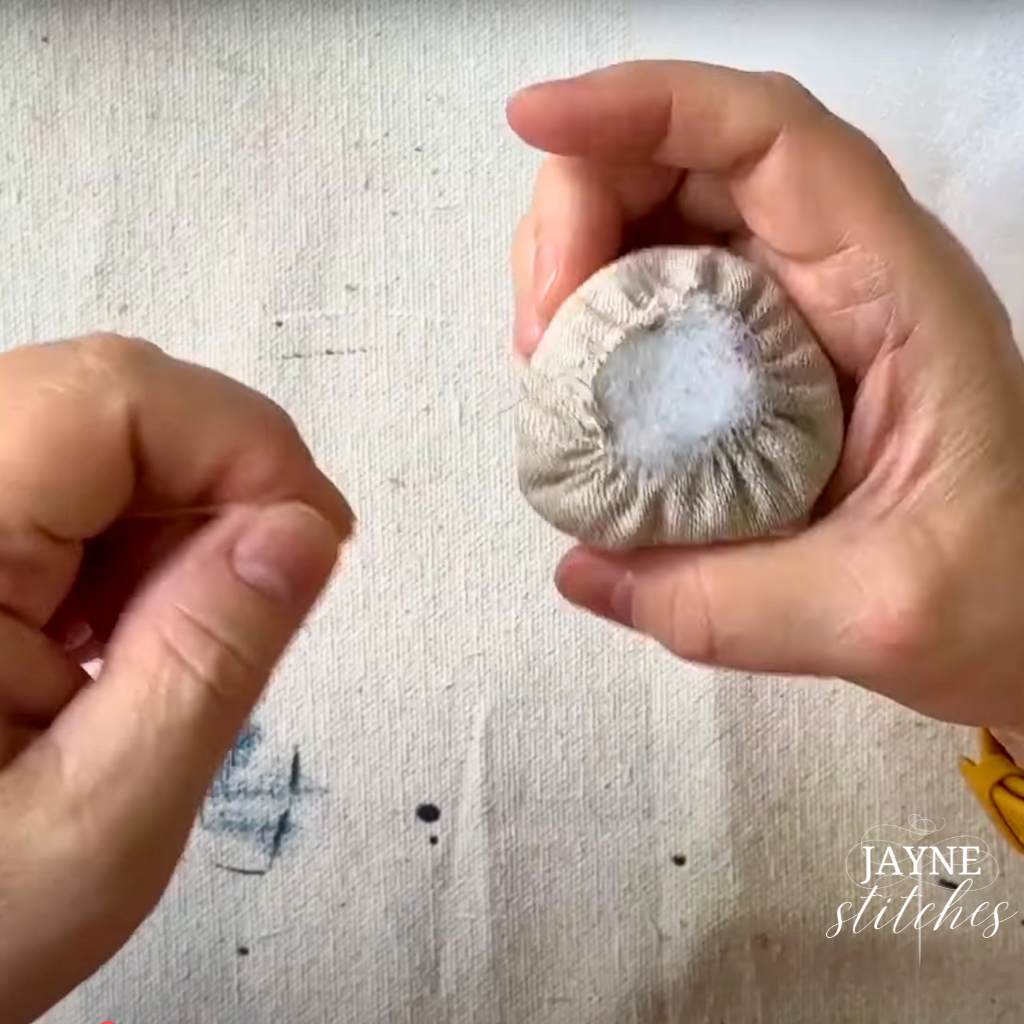
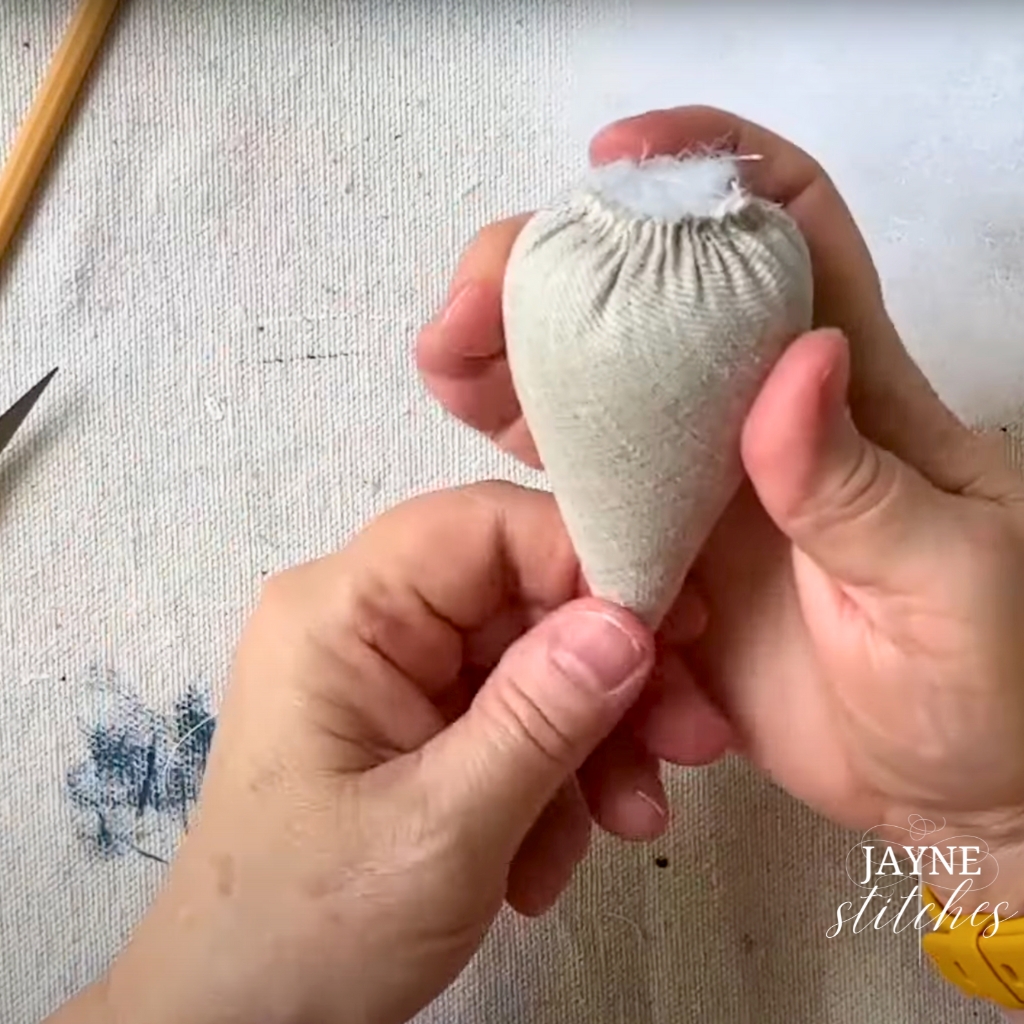
When done pull the gathering thread tight to close, knot it securely.
Using the top leaves template trace and cut from your wool felt.
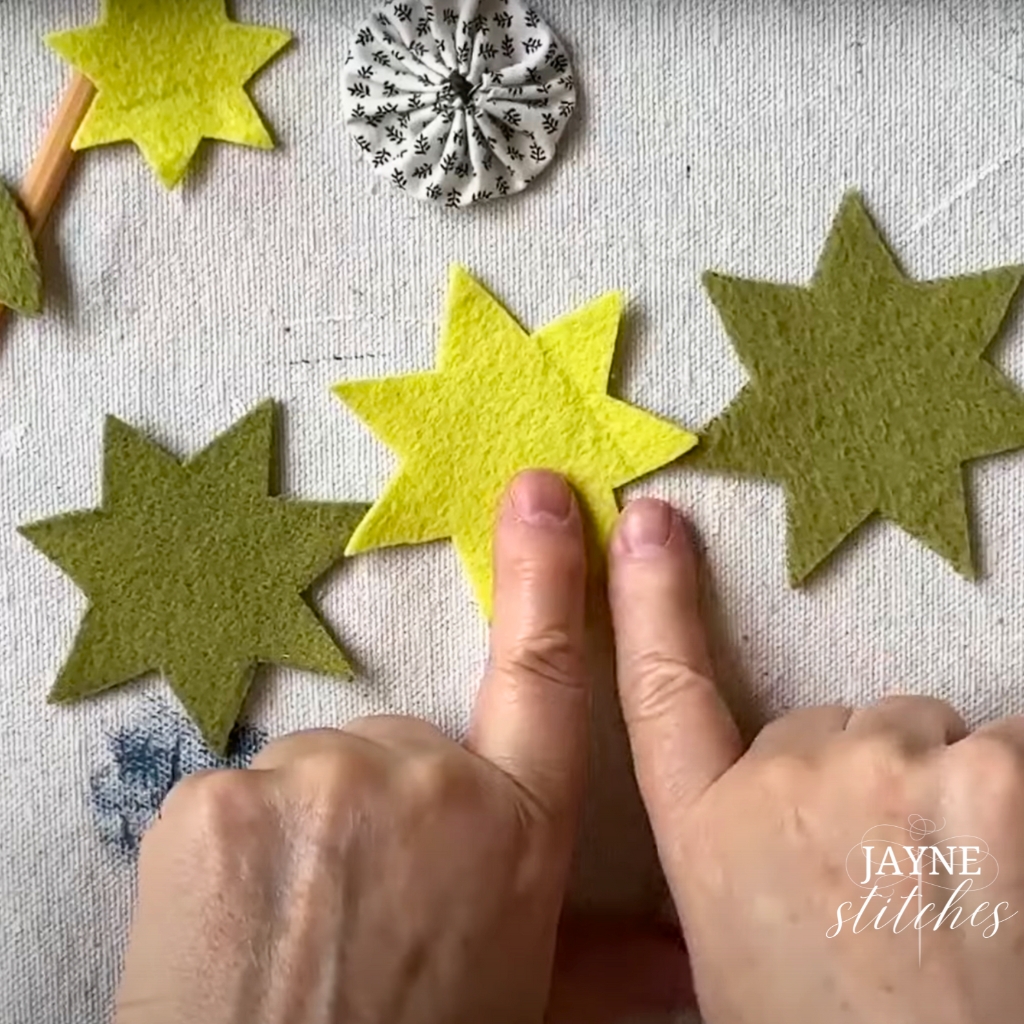
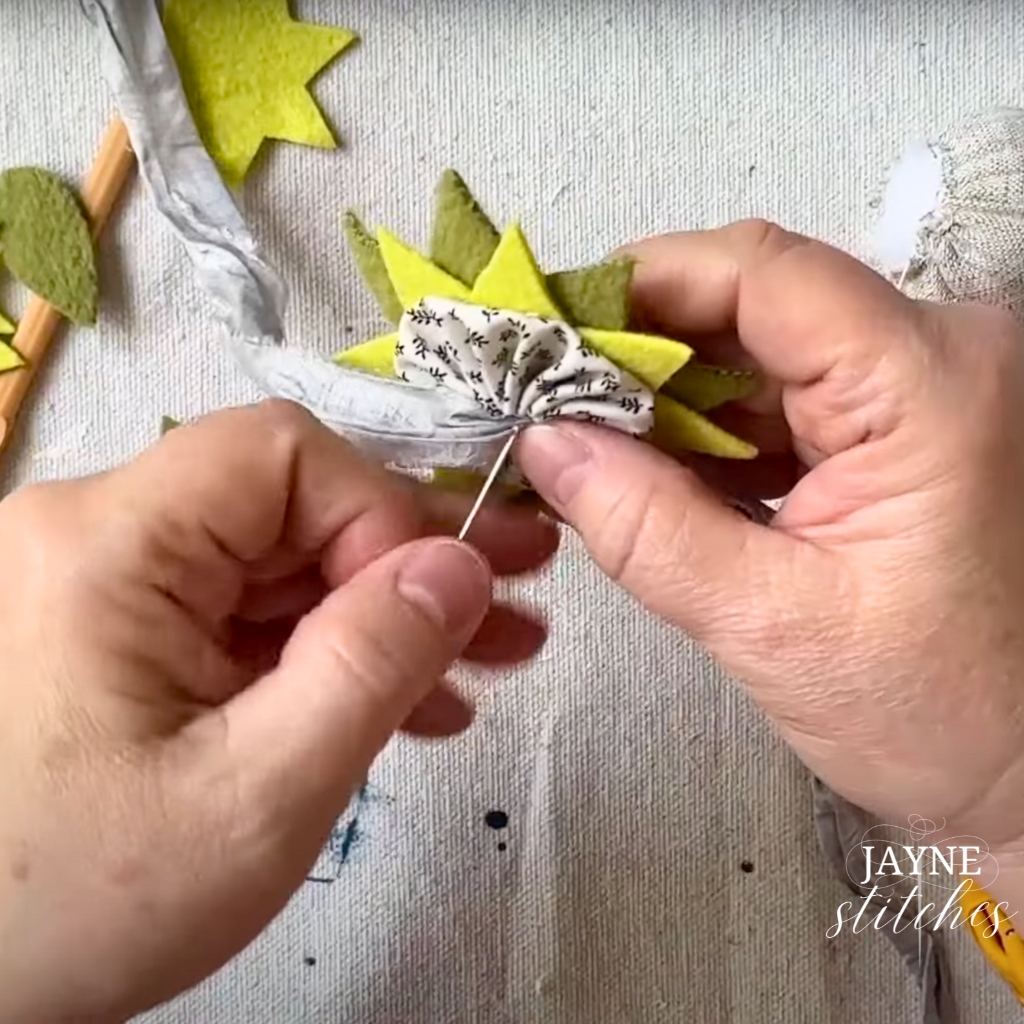
I’ve also added a cotton yo-yo to the top of my pincushion. I used the Large (1.75″) Clover yo-yo maker to make mine.
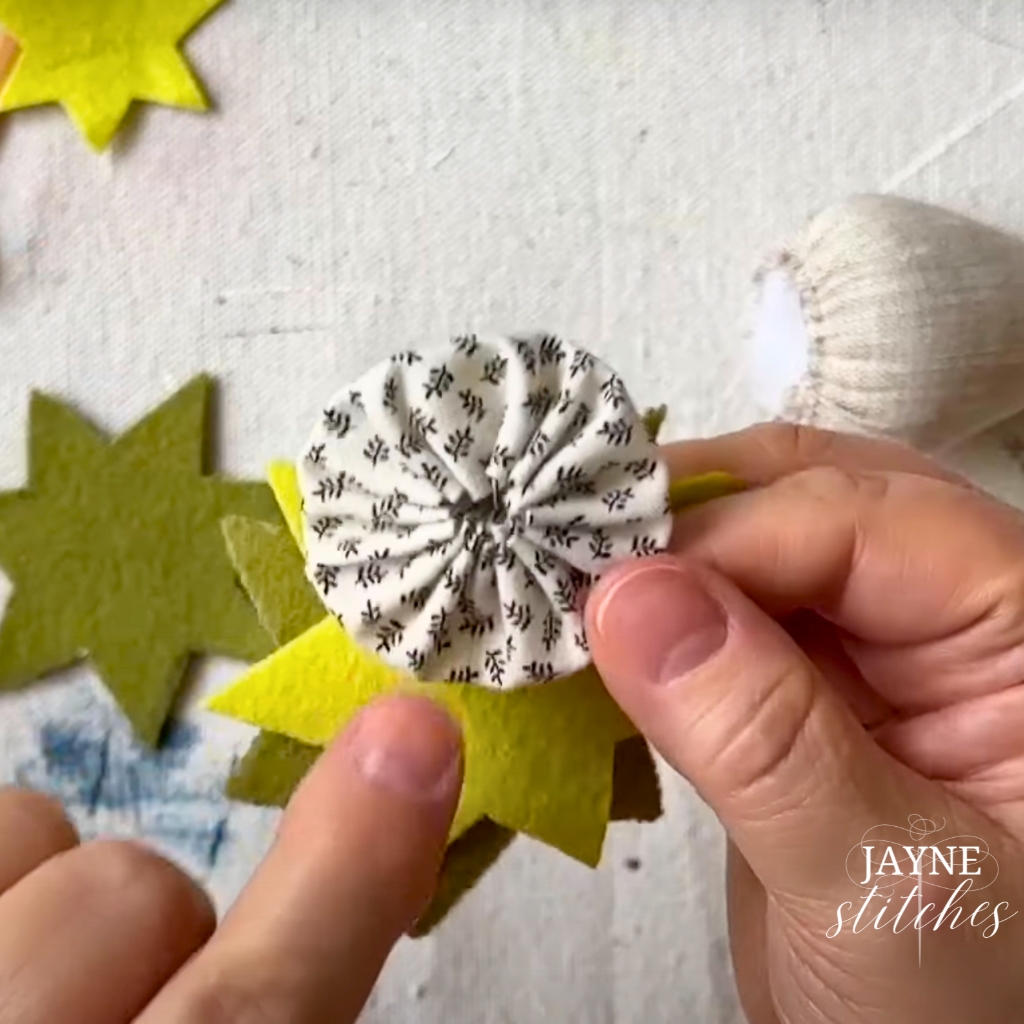
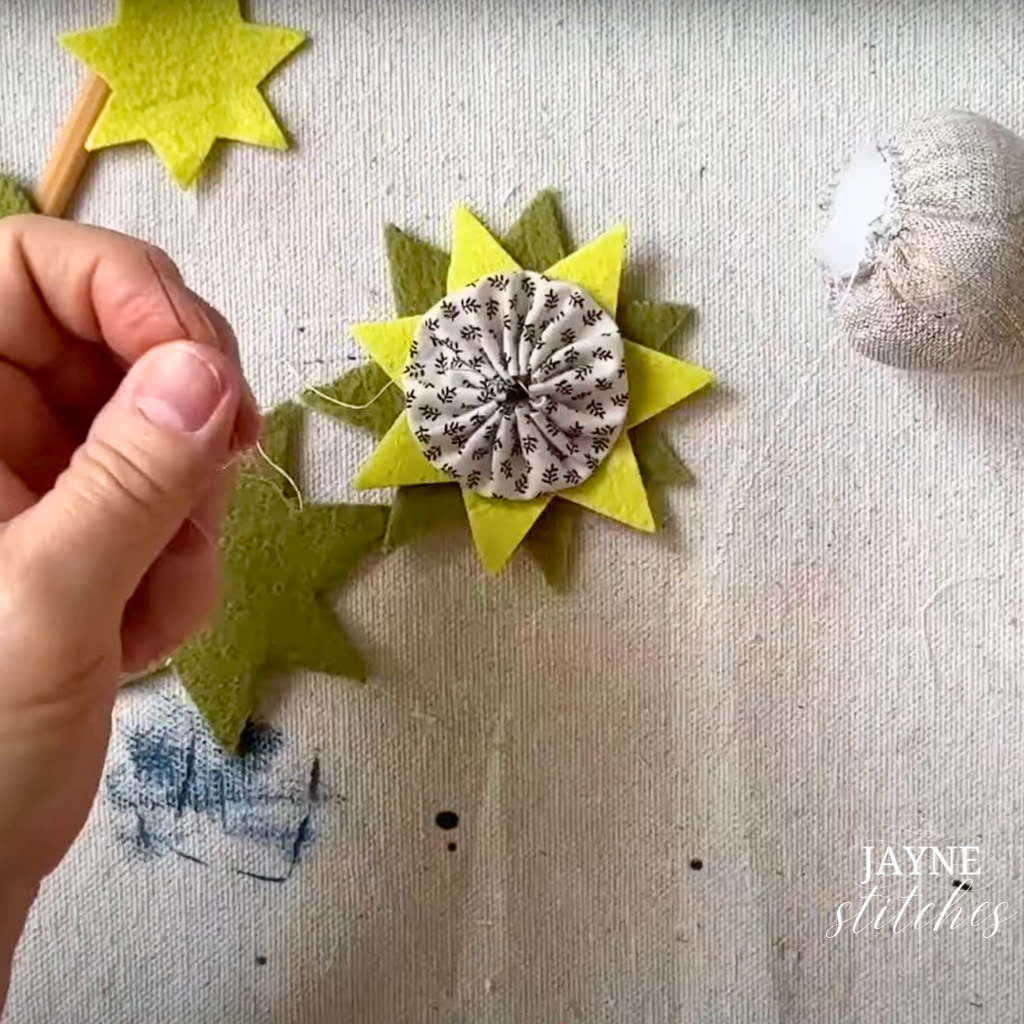
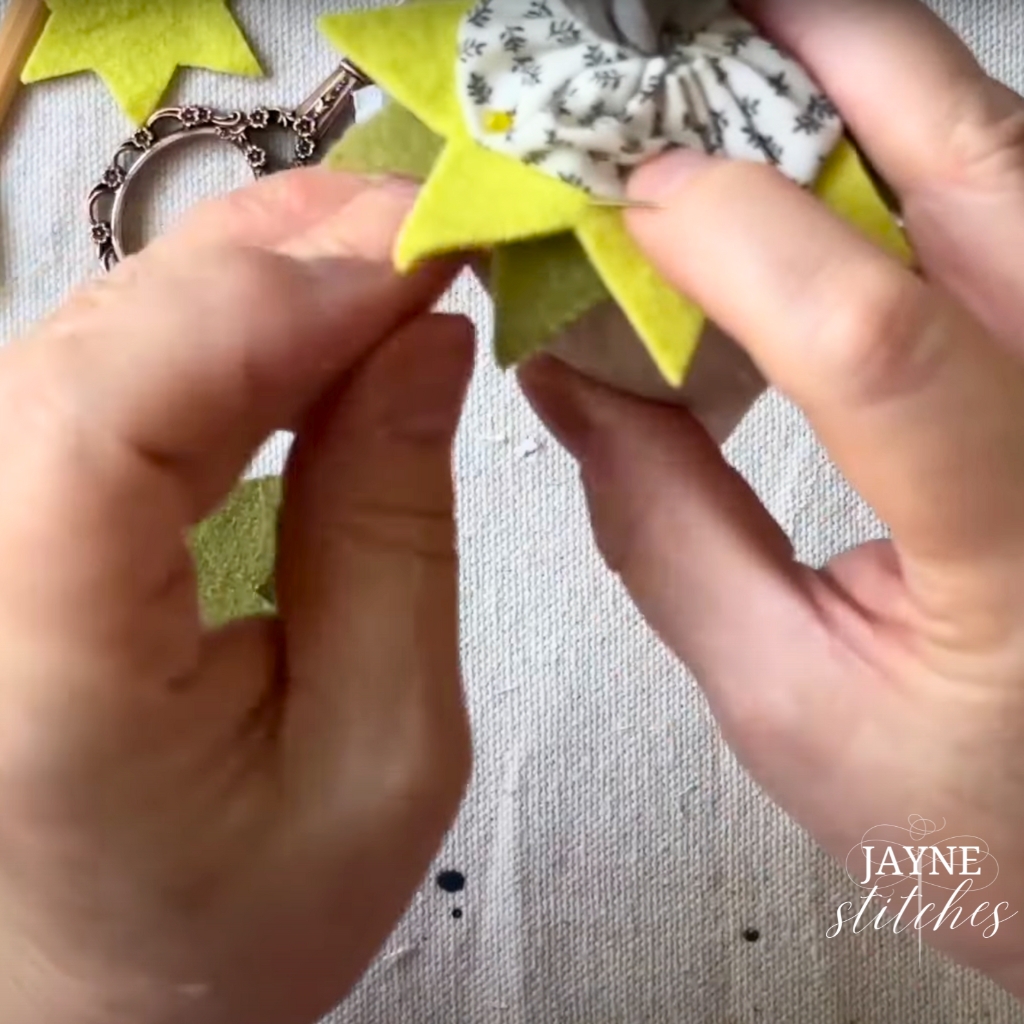
Stitch the wool leaves shape (or shapes, you can cut two in different colors and layer them) and yo-yo together with the yo-yo on top. Go through the middle of the yo-yo to stitch, do not tie off and pull thread through the top of the yo-yo.
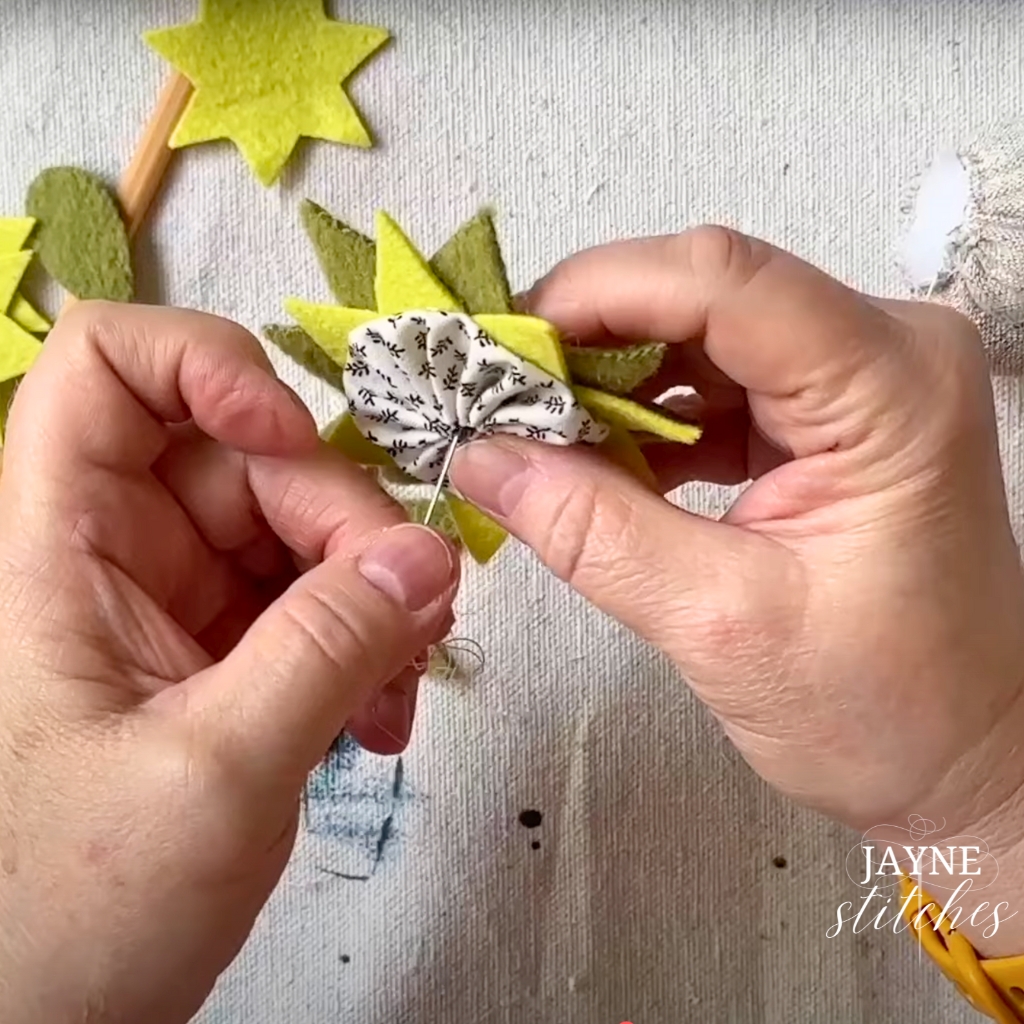
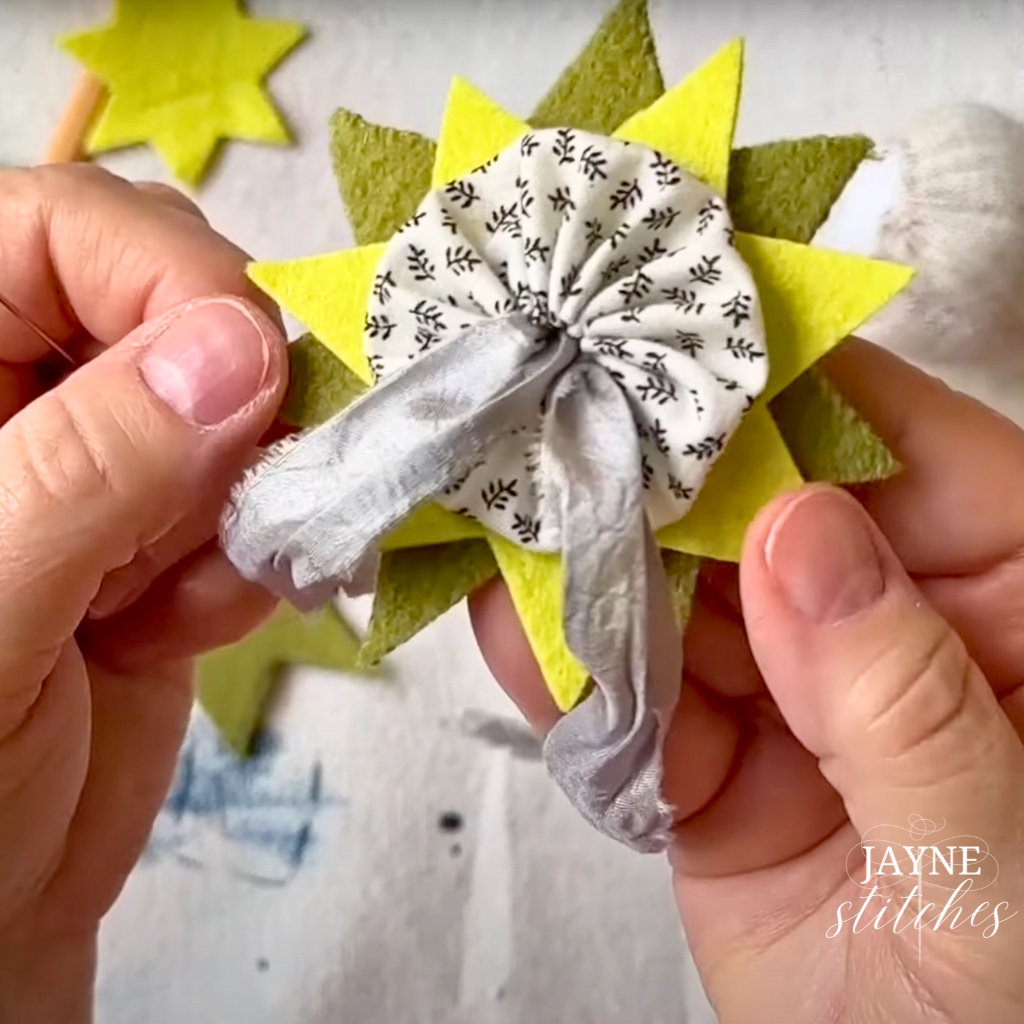
Cut an approximately 18″ length of ribbon, fold in half to find the center. Using the needle and thread coming from the yo-yo sew a gather stitch across the middle of the ribbon and then put needle though the yo-yo to the back of the wool leaves and pull to secure the ribbon, add a couple more stitches through and end on the back side of the wool leaves shape and knot off.

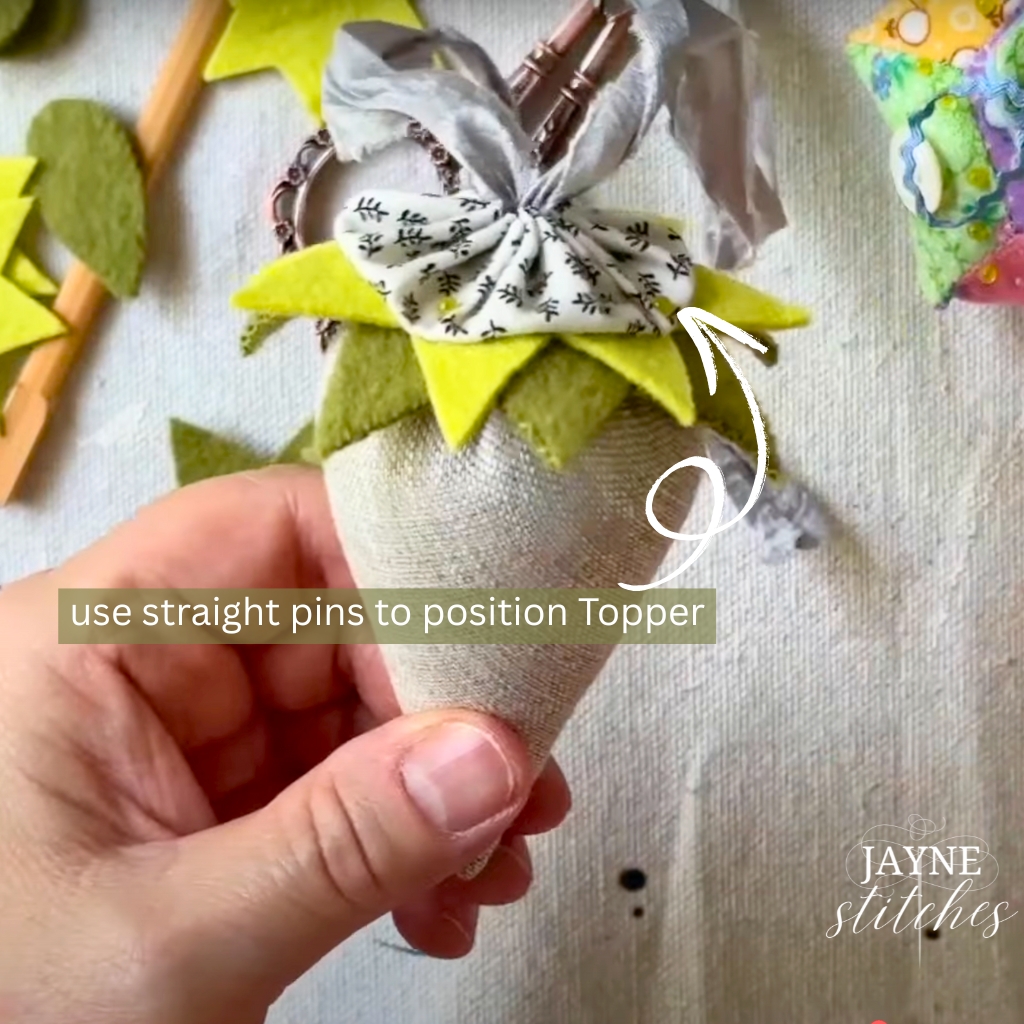
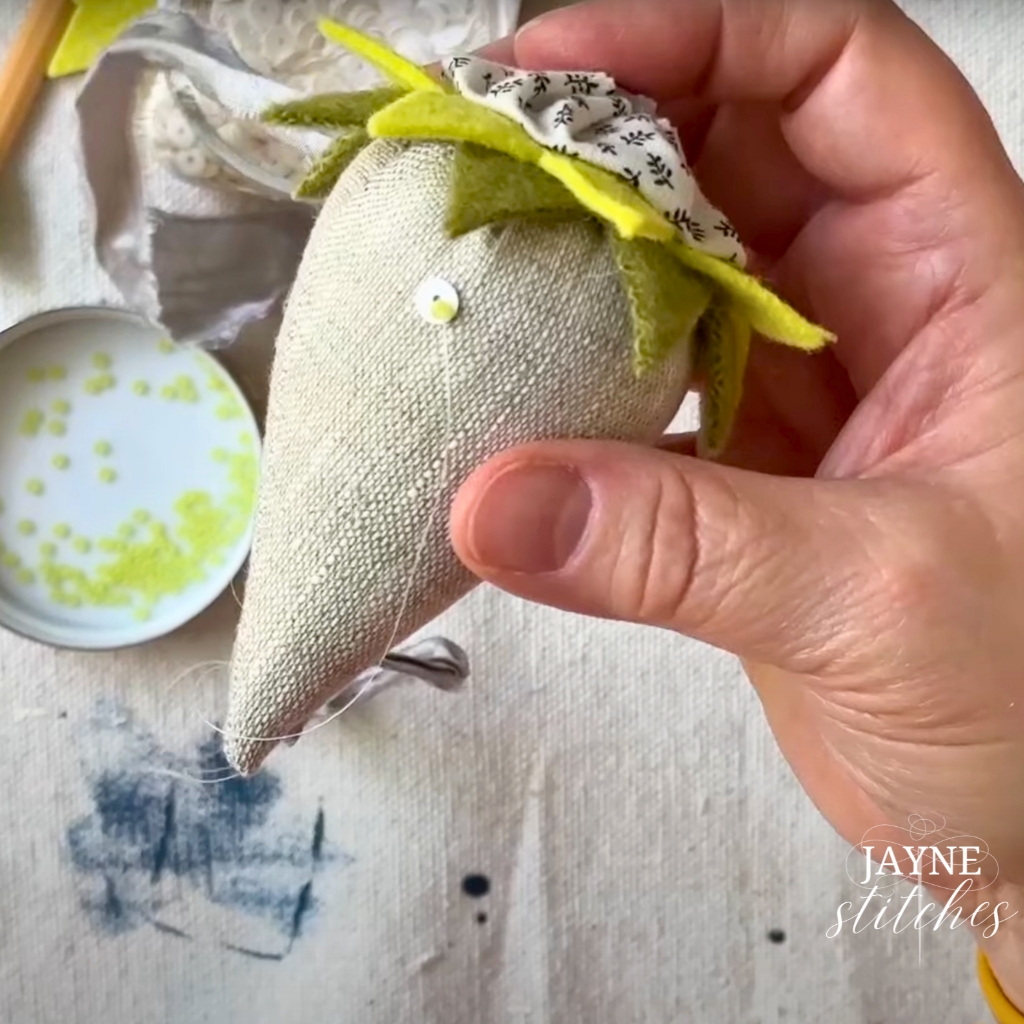
Position Topper to the center of the Strawberry top, use straight pins to hold it in place while you sew.
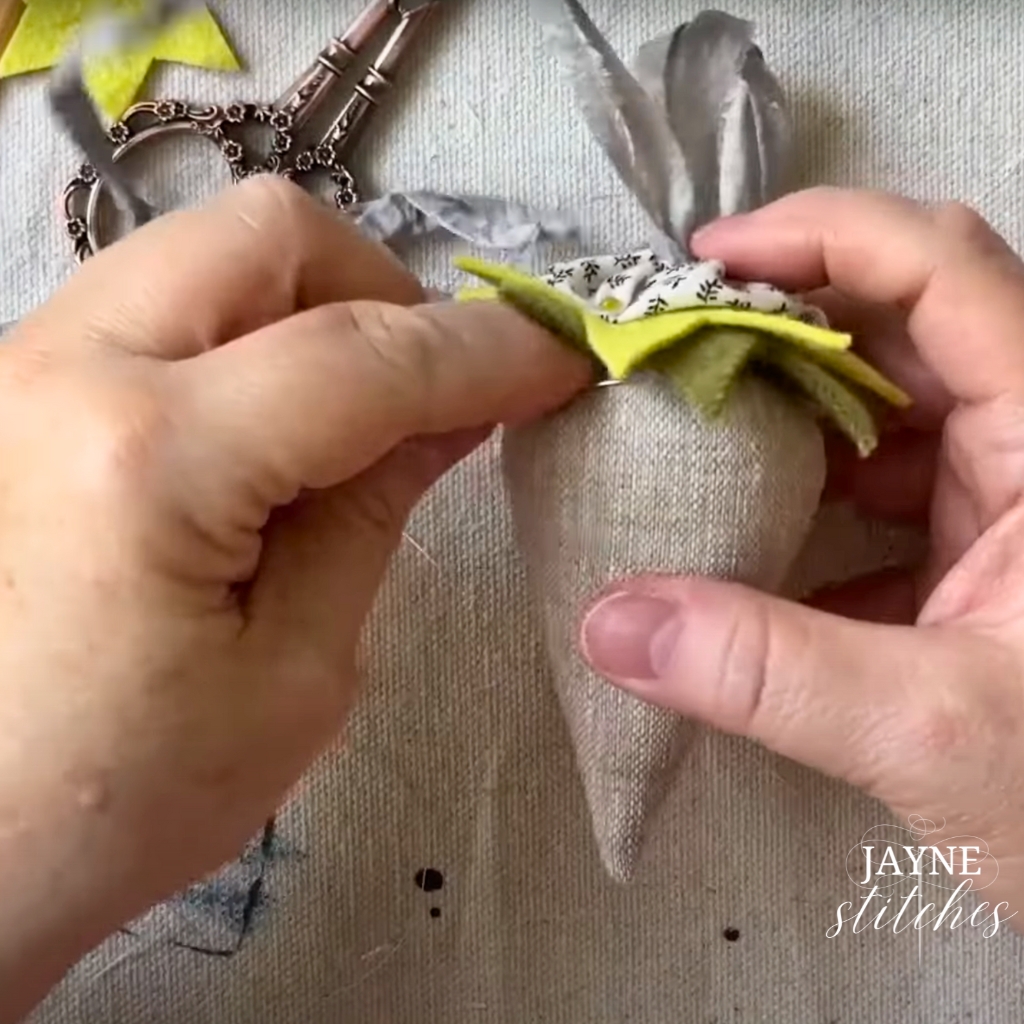
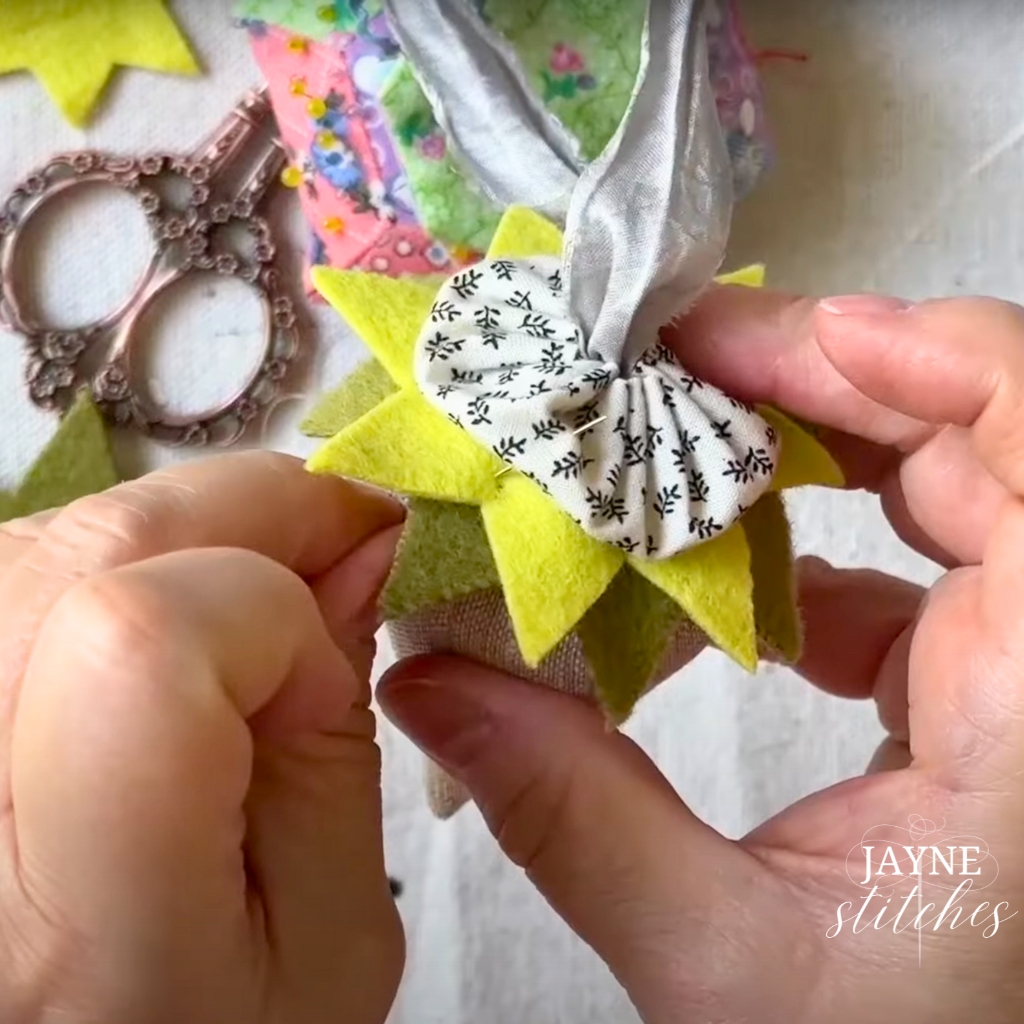
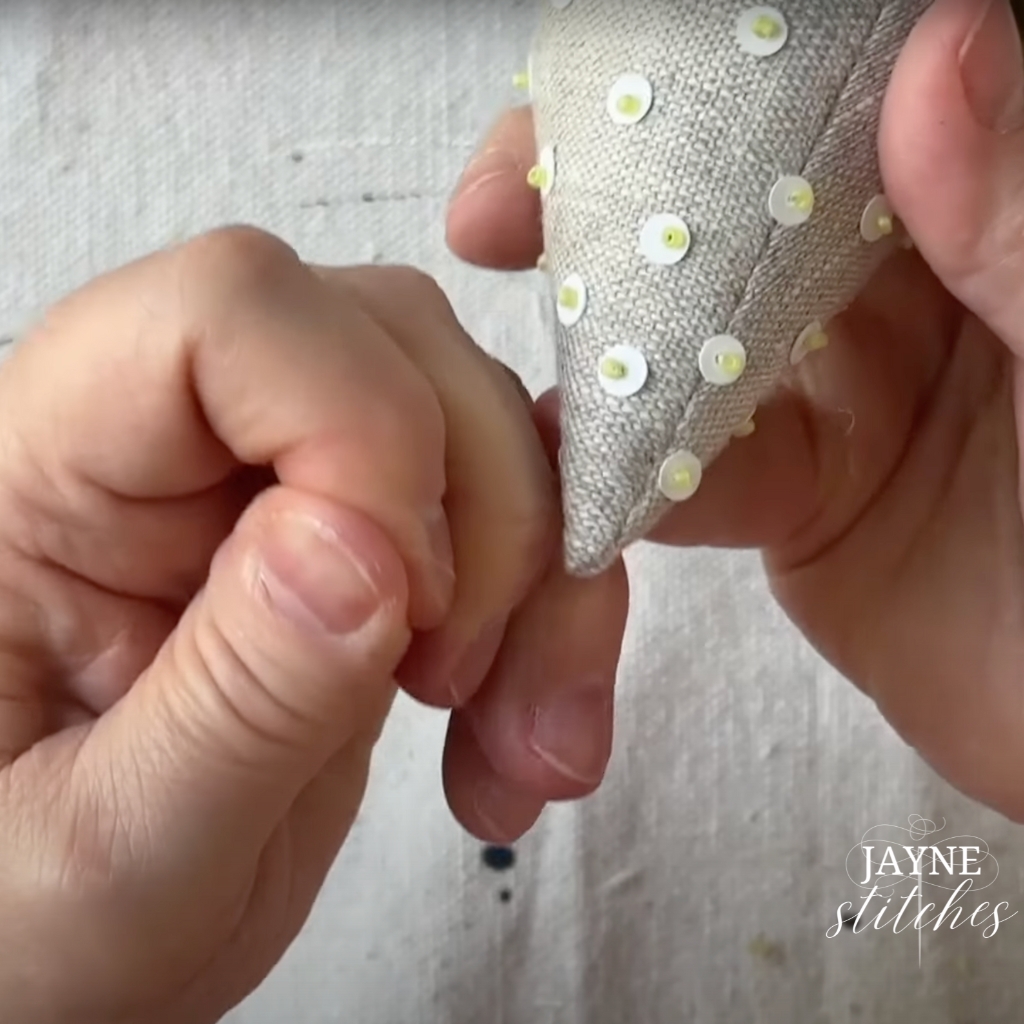
Knot off your thread as you began, under the leaves.
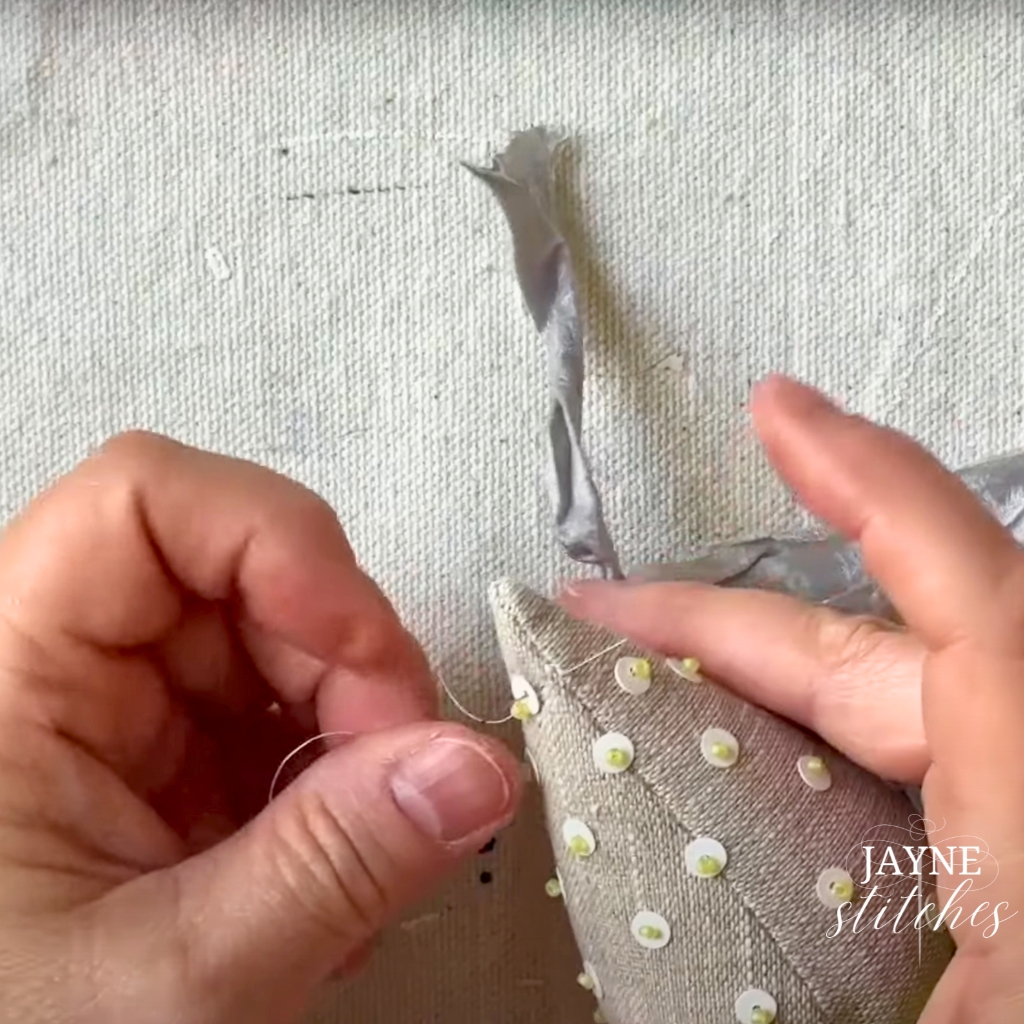
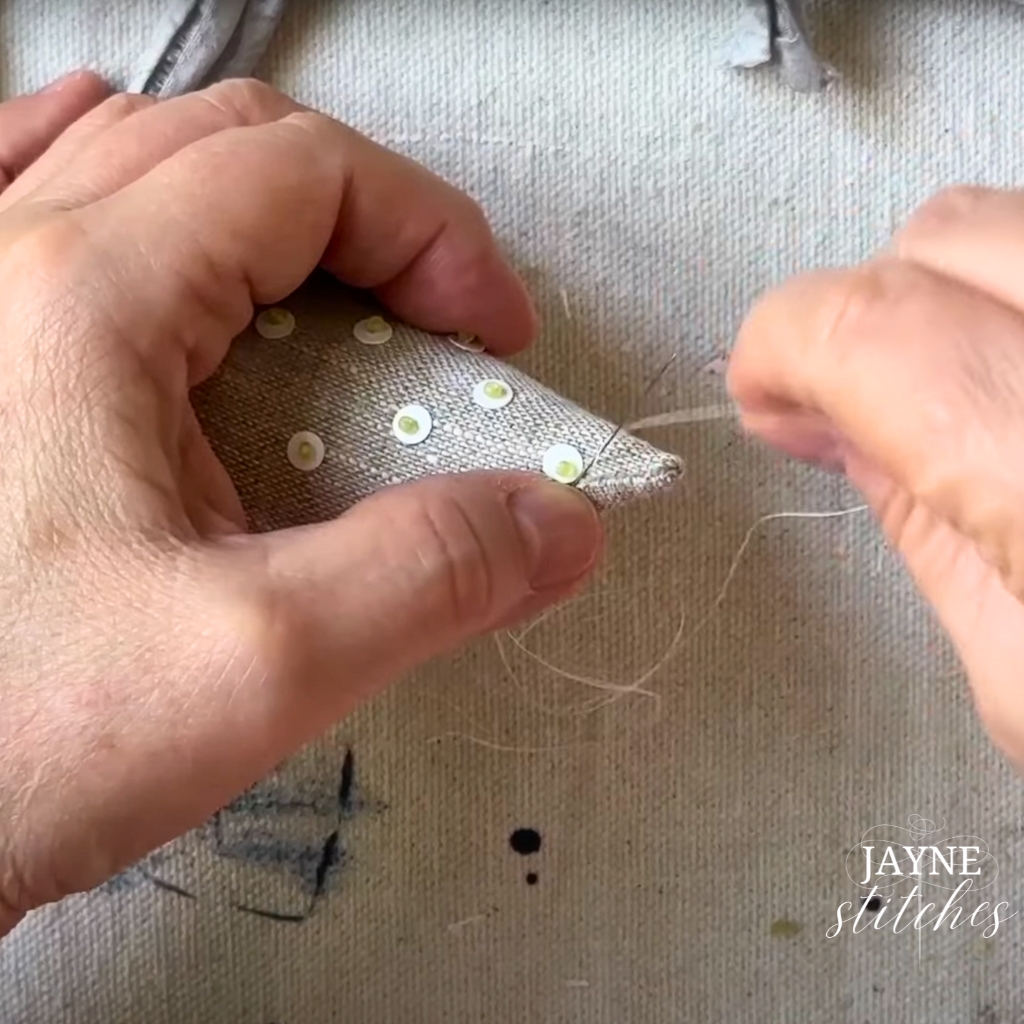
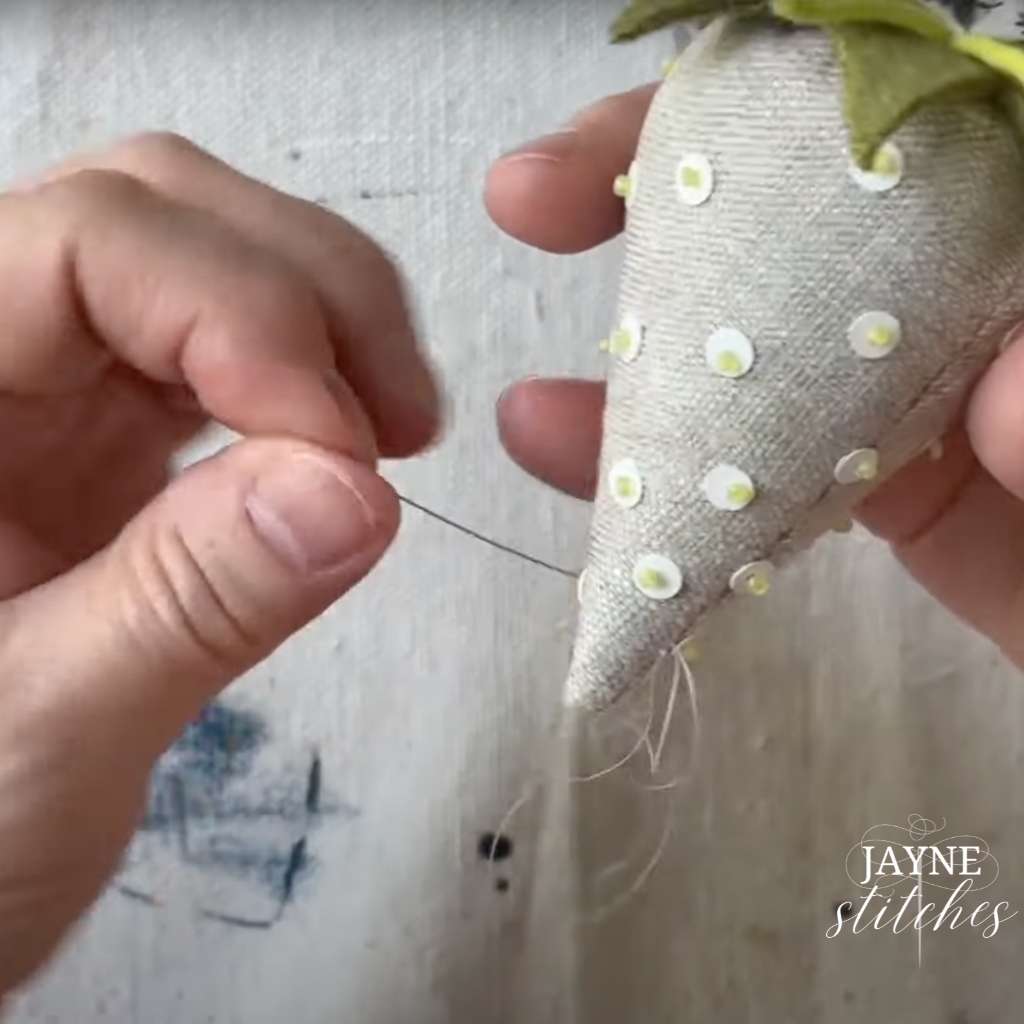
Now the fun part! Using a beading needle and Nymo thread, stitch on tiny seed beads and sequins to decorate the body of your strawberry. Scatter them all over like sparkling seeds, or make tiny patterns.
To sew on the sequin and bead like I do first pick up a sequin with your needle then a bead then go back through the sequin hole into the Strawberry body and come out where you want your next sequin and bead.
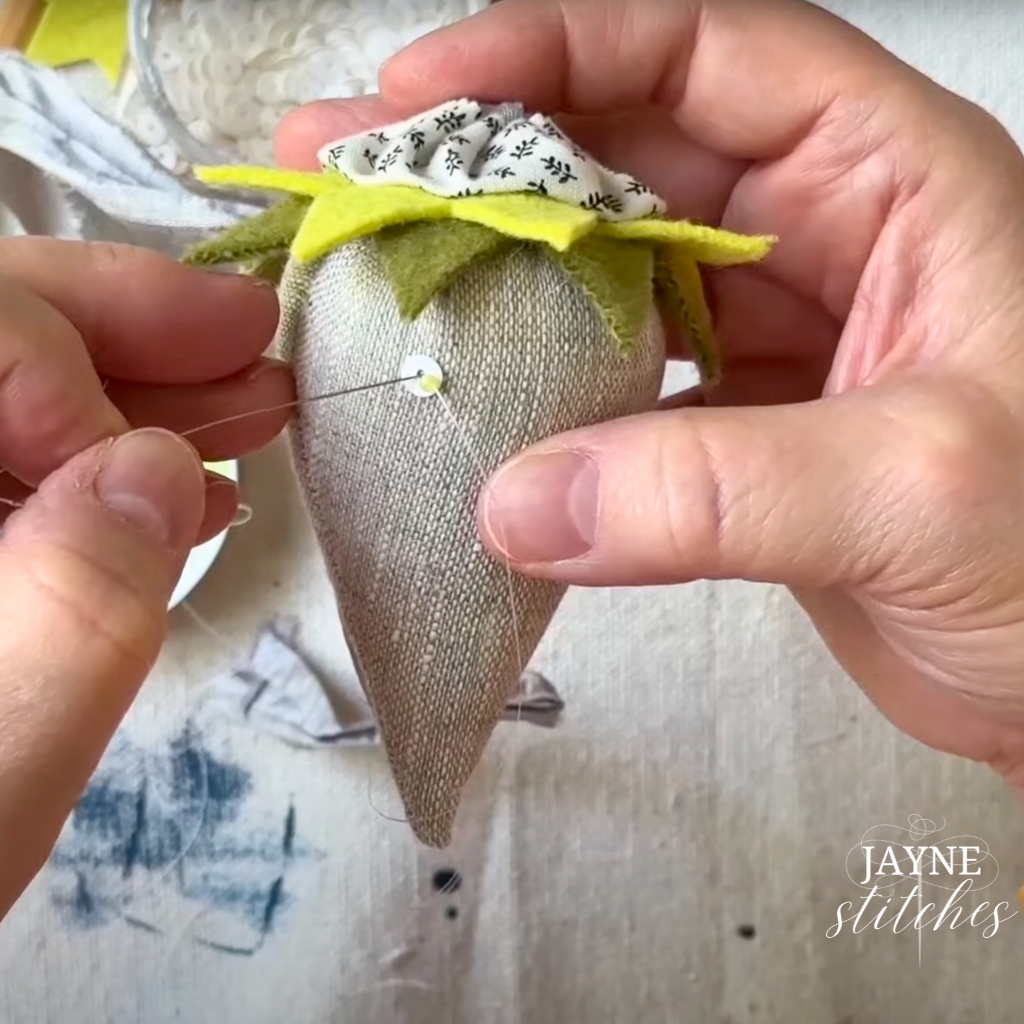
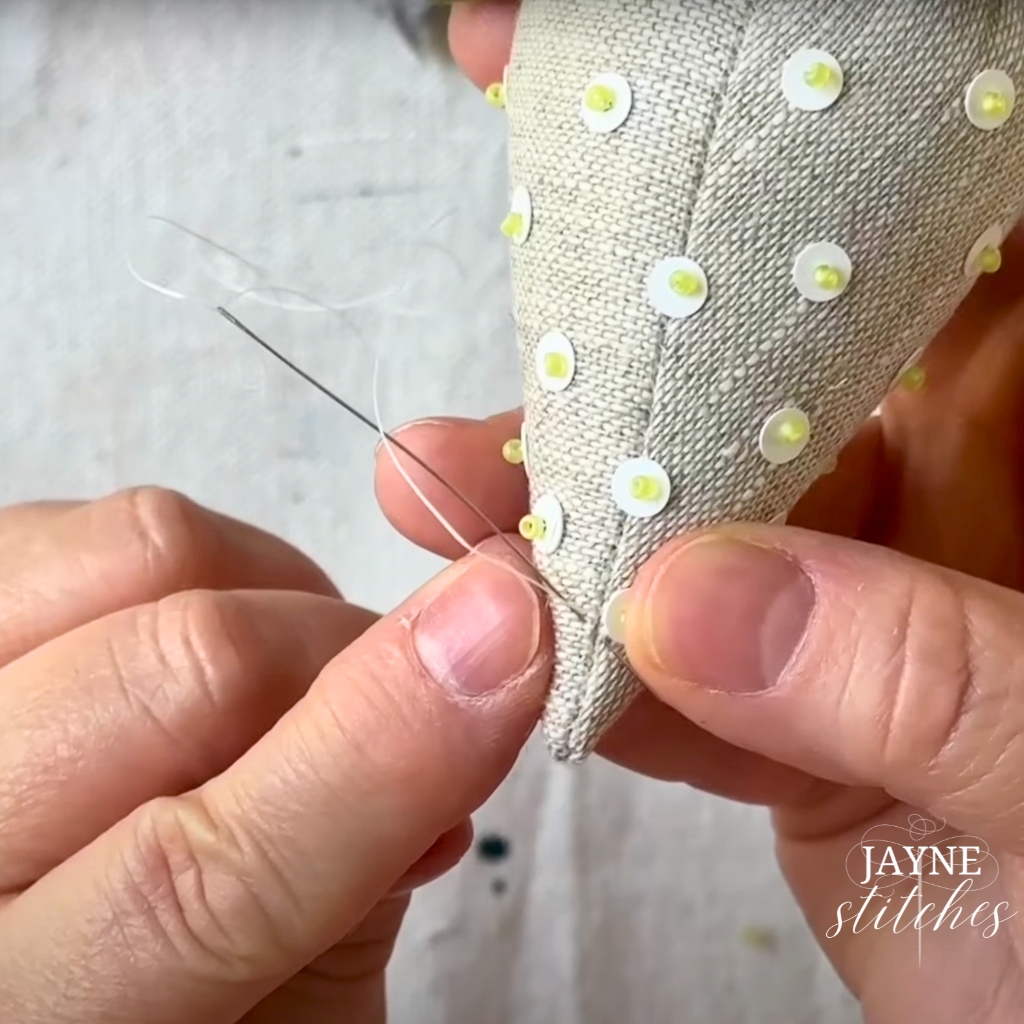
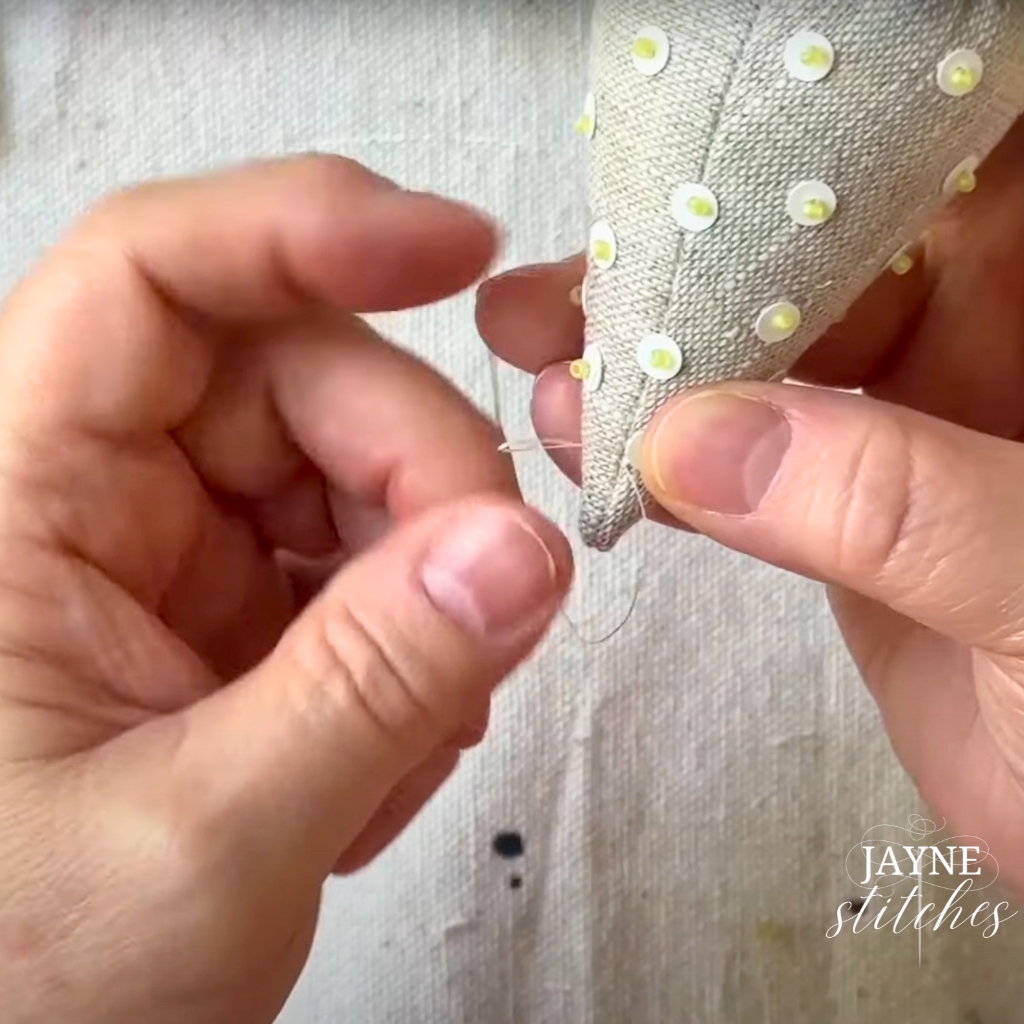
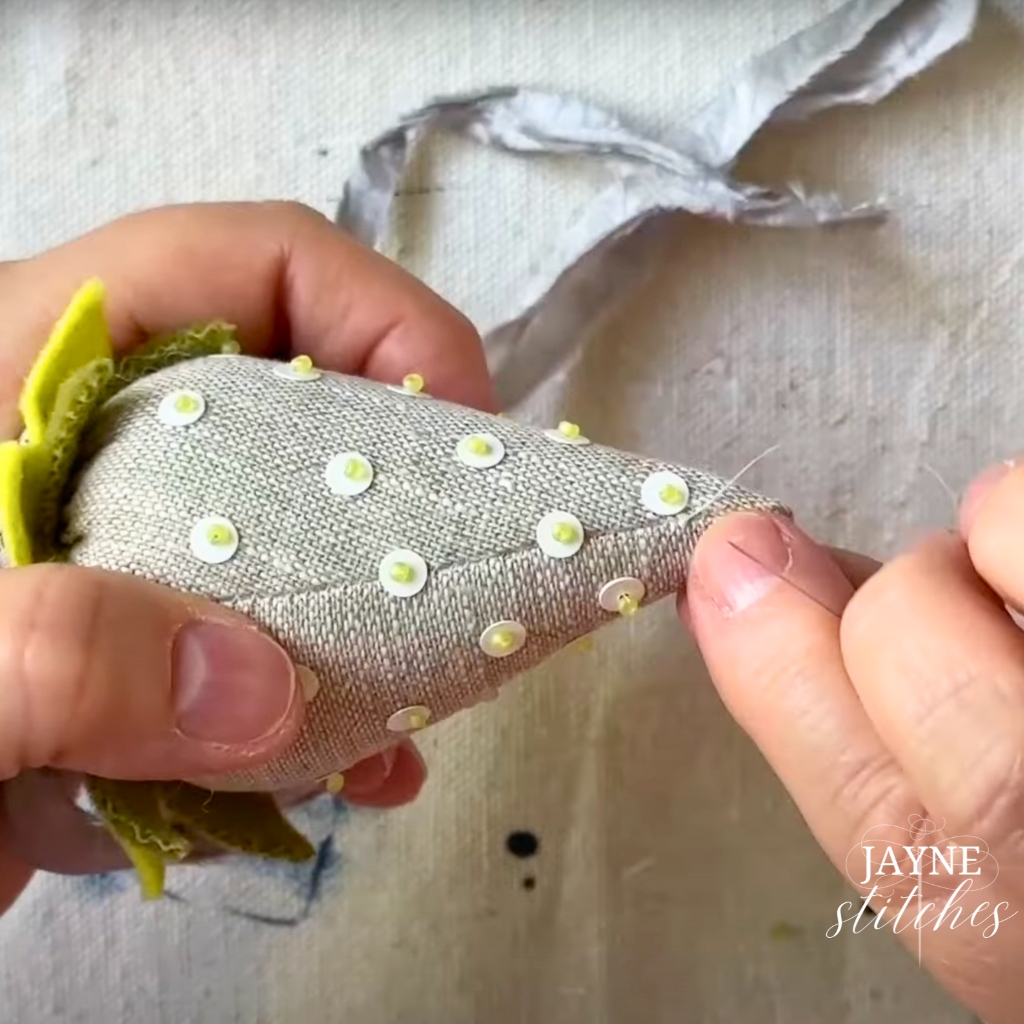
Take your time here—it’s one of those meditative, slow stitching steps I really love.
If you make one (or a dozen!), I’d love to see them. Tag me or send a photo—nothing makes me happier than seeing your beautiful stitching.